Wednesday, June 19, 2013

Quilt-Along Update

After an extremely busy week and weekend, I have FINALLY finished piecing the back of the quilt for Kelly Young's My Quilt Infatuation Quilt-Along.  I still haven't pieced the front, but I should be done with that in a few days.  I had hoped to have both sides done by now, but my anniversary was last week and my husband's birthday and Father's Day were both this weekend.  Since this past weekend was all about him, my sewing machine didn't see much action.  My goal is to have both sides pieced and the quilt basted by the end of this coming weekend.  Of course, my daughter has swim lessons every evening for the next 2 weeks and my in-laws arrive on Thursday.  There should be plenty of time...or not.  I wouldn't hold your breath if I was you.

Enough lamenting over busy schedules...let's celebrate the small success of finishing a very important portion of this quilt.  I really love how the back turned out.  It's a clever way to use all the fabric scrapes after cutting up the bricks for the front and I hardly have any left over. 


I'll trim up the sides before I start quilting, but not until after I baste the quilt.  There's still 2 key decisions that have to be made in reference to this quilt.  First, what should I do for the quilting that will help showcase the front and back?  I only have straight-line quilting skills, so don't suggest any free-motion quilting solutions.  I've thought about quilting vertical lines so that it will add some contrast to the horizontal lines in the piecing of the fabrics.  I'm afraid the alignment of all the horizontal lines on the front and back may be a bit tedious.  I would hate for the back to be slightly off and cause the quilting to look sloppy.  My second decision deals with the color of the binding.  The fabric patterns are so busy and colorful, I think a solid color would work well for the binding.  The difficulty lies in the act of deciding which color to pull from the fabrics in the quilt.  Any suggestions? 

Saturday, June 15, 2013

Simply Giraffes

This quilt marks the beginning of the year 2013.  (I'm slowly but surely catching us up to the present.)  At this point, I had taken a 6-month hiatus from quilting due to some craziness in my life...nothing too dramatic, just 2 full-time working parents with 2 very energetic toddlers and a husband who was also in grad school full-time.  Adjusting to the shift in our home life took me a bit, but once I did, I was determined to start quilting again.  I decided to do a hand-pieced and hand-quilted quilt that I could take with me and quilt while I was with the kids and not be tied to my sewing machine...that was a bigger undertaking than I had first thought and a story for another post.

When I found out a friend, Emily, was expecting her first child, I wanted to do something simple that wasn't too daunting and I could finish quickly.  I also knew that I wanted to trying machine quilting and I wanted to learn how to make my own binding.  While on Pinterest one day, I found my way to this blog from a quilting pin.  This simple quilt was exactly what I was looking for.  There was no piecing involved.  I knew I could finish the quilt over a weekend without having to completely ignore life for several days to get it done.  I knew the colors of the room were aqua/teal, yellow and gray, so I bought 3-yards of gray fabric as my background and bought several different shades of aqua/teal and yellow threads to quilt my lines.  I cut my yardage in half and basted my quilt, which felt weird since I was using solid pieces of fabric and I started machine-quilting.  I started putting randomly angled lines across the quilt changing out my thread color periodically until it was thoroughly quilted.  I was amazed at how easy it was and how quickly I got it done...what a wonderful introduction this quilt was to machine-quilting.  I found some yellow and gray patterned fabric that coordinated well and learned how to make the binding for the quilt following Amy Gibson's Block of the Month 2012 binding tutorial.  It was easier than I imagined.

When the quilt was all done, I stepped back and felt dissatisfied with the results.  As easy as it was to finish the quilt, it lacked a point of interest.  At this point, I started stalking Emily's Pinterest page for applique ideas.  She had a few giraffe items on her page, so I went searching for something I could create a pattern of.  I came across this print and ran with it.  I pulled some fabric from my stash, pieced and hand-appliqued the giraffes in place and was pleasantly surprised with the final results. 


Friday, June 14, 2013

Around the Block

As I continued to learn more about quilting from watching the videos from Craftsy's Block of The Month 2012 class, I was introduced to the wonky log cabin pattern.  There was something about this pattern that called out to me, so I decided to give it a try.  My friend and fellow day-care mother, Leah, was expecting a little boy and I wanted to do something special for her.  She and her family have become wonderful friends to our family and I wanted her to know how much we appreciated  her friendship.  

For this quilt, I found a fun jelly roll online...I'm not even sure of the fabric collection's name.  I took each strip and cut them down to different widths.  As I started piecing the blocks together, I realized that this was going to be more tedious than I had originally thought.  I'm a stickler about pressing my seam immediately after I sew one, so there was lots of sewing and stopping to press.  I had to keep reminding myself that patience is a virtue and that ALL the steps would be worth it when I finished the quilt.  I sewed a thick border around each block of a solid color.  I then took my 12.5 inch square template and skewed it to give each block an even wonkier look when I trimmed them up.  I hand-quilted this quilt by following the squares around the block.  I just started in the middle and worked my way outwards.  It's a little easier to see the pattern on the back of the quilt.  Again, I hand-appliqued the baby's initial on the back of the quilt.  I was really pleased to see how well it all came together, but it might be awhile before I make another wonky log cabin.  Maybe I'll try a regular log cabin next time...


Thursday, June 13, 2013

Needle and Thread Thursday

Kelly Young, from My Quilt Infatuation, is starting a link party on Thursdays and I've decided to join in.  Here is my current quilt project I'm working on, which just happens to be the Quilt-Along with Kelly Young.  I have everything cut and put on my design wall (a vinyl table cloth with a flannel backing) for the front of the quilt.


I also have started piecing the back of the quilt.  One thing I'm looking forward to with this quilt is the fact that either side will be show worthy.  The strips on the back are coming together and looking better than I could imagine.


Tuesday, June 11, 2013

Quilt-Along: Cutting Fabric

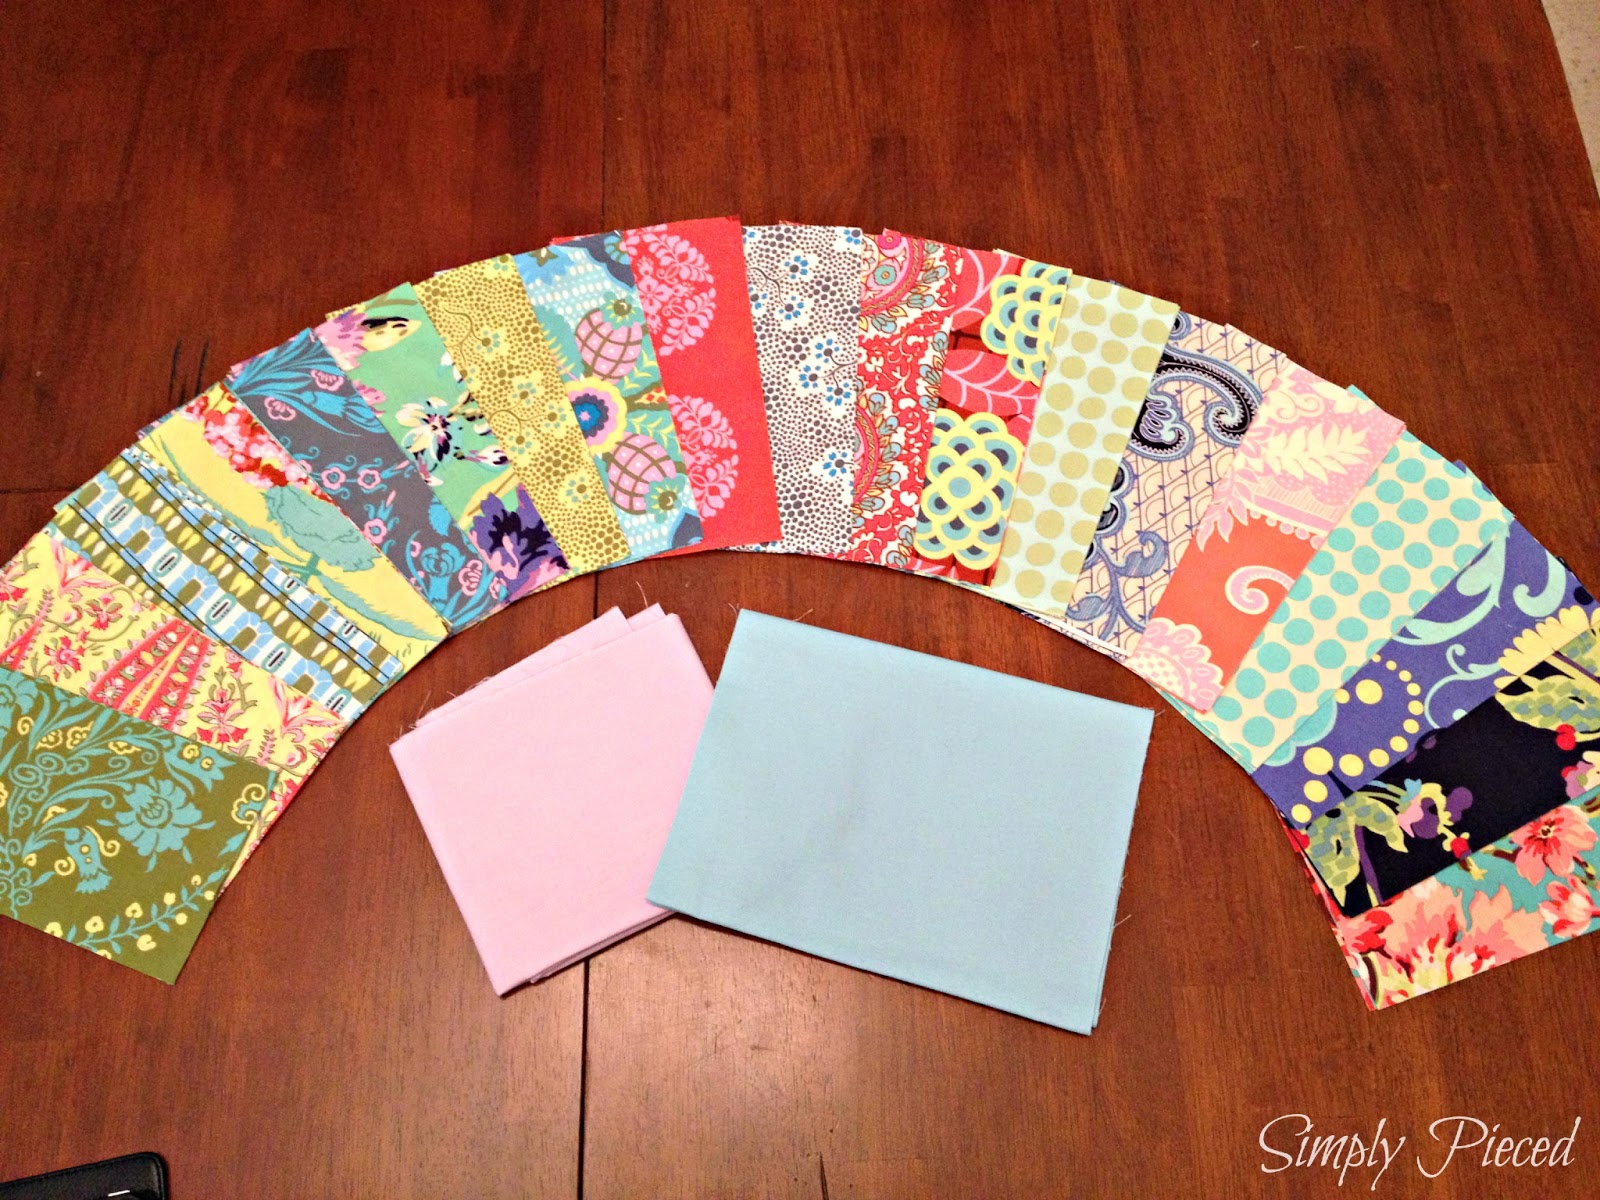
I have decided to do a quilt-along led by a fellow Memphis-Area Modern Quilt Guild member, Kelly Young.  She has a fantastic blog, My Quilt Infatuation, where you can follow along if you'd like, or just check out all the great quilts she has created.  This week's focus is getting our fabric cut and ready for piecing.  I'm combining 2 scrap-packs from Southern Fabric of Amy Butler's Love and Cameo collections.  With a scrap-pack, you only receive 8-10 fabrics in the collection of various sizes that equal to 2 yards of fabric.  Since I really liked both collections, I wasn't too worried which fabrics I received.  I think the collections compliment each other nicely.


I have all my large bricks cut with enough to make all the end blocks when it comes time to piecing it all together. The long strips are what is left over of each fabric and I'm going to try and create a fun backing to the quilt using those.  I've also decided to use light purple and light aqua solids to act as neutrals in the mix.  I'm ready for the next step and I can't wait to see how it all comes together.  I'll keep you posted on my progress.

Monday, June 10, 2013

Sneak Peak Revealed!

I was accused of being a tease with my sneak peak post, so it is now time to reveal those three projects.   A full-feature post for each quilt will follow soon.

Batman Quilt:


Girly Charm:


Wild Rudgy Stripe:


Friday, June 7, 2013

A Star is Born

If anyone knows me particularly well, they know that I have an eye for detail and pattern.  I'm not referring to style and fashion because I would probably say I'm lacking those in some ways...I'm talking geometry and repeating patterns.  I can find the small parts that make up the whole and figure out how someone put something together.  That's exactly what I did with this next quilt. 

In one of my random Google searches, I found a Carpenter's Star Quilt.  I thought it was interesting and I started looking at it in more detail.  I quickly figured out that it was made entirely of half-square triangles...I KNOW how to make a quilt from half-square triangles.  It was all a matter of placement.  I knew I had my next quilt pattern but I had no idea what fabric I was going to use.  After exchanging emails with the mom-to-be, Allie, she sent me an image of the fabric she planned to use for the baby's room. 

Now came the fun part of searching for fabric and this is what I found at Fat Quarter Shop.  I was thrilled I found fabric that pulled all of the colors together and coordinated so well.


After cutting and piecing, I was so excited to see the whole thing come together.  The hand-quilting was also a little different.  I wanted to do something that would soften up the look and make it decidedly more feminine.  By adding the quilted flowers, I think I really finished off the quilt nicely.  I also appliqued the center part of the quilt onto the back.  I didn't know the name of the baby when I was finishing up the quilt so I used the scraps to recreate the star.


Related Posts Plugin for WordPress, Blogger...